Instructions For Fujifilm 3D Camera
Where can I get the instructions for 3D picture taking?
You can download the 3D Capturing Manual here.
What precautions need to be taken before shooting 3D pictures?
- The capture surface should avoid direct light, such as ceiling lights, window lights.
- Use the upper dial to set the shooting mode to Auto.
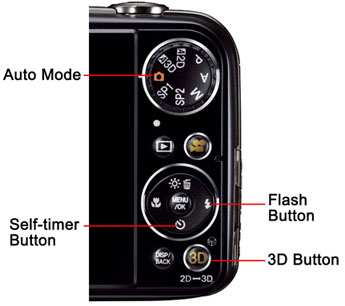
- Use the 3D/2D button at the bottom right corner to set the image format is set to 3D.
- Use the lower dial to set the flash option to Forced Flash.
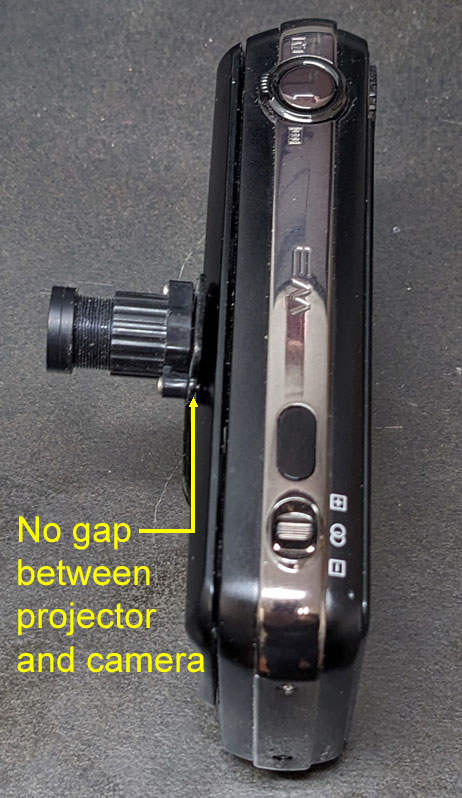
- Make sure no gap between the projector lens and the camera cover.
- The lens cap must be removed.
How can I tell whether my 3D pictures are good?
After a picture is taken, press the preview button, you should see the picture on the display. Here are checklist:
- Does the picture has stripes? If not, it could be either the flash mode is not set to Forced, or the cap still covers the lens.
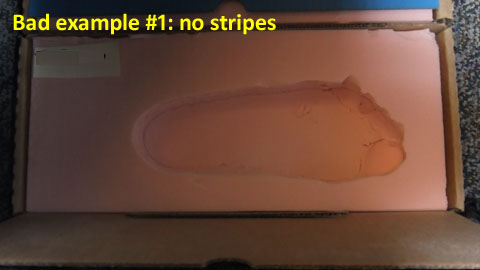
(picture without stripes)
- Are some areas of the capture surface over-exposed (white out)? Normally under-exposure is not a problem, as long as the flash is on.
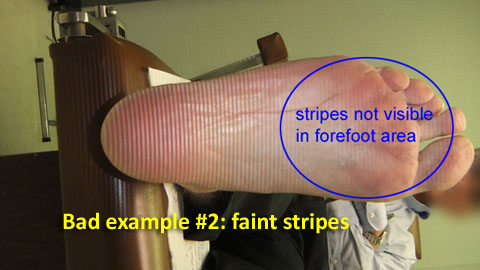
(picture partially without stripe)
- Is the picture blurry like the one above? If so, it means that the camera did not achieve a good focus or was shaken by the user. Usually this can be prevented by using a tri-pod and the camera timer, also press the shutter-button half-way to let the camera to find the correct focus before taking the picture.
- Do you see the picture information on the display like the picture here? If not, press the "Disp/Back" button and the "Macro"
 button to change the display setting.
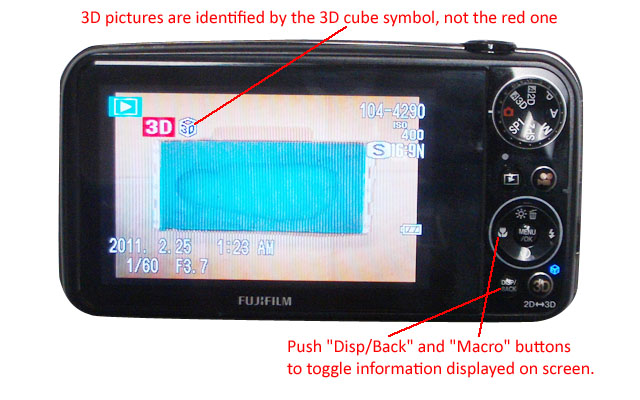
- Do you see the 3D cube
 (not the word 3D with red background) on the display like in the above picture? If not, the picture is not a 3D picture, to try reshoot the picture using the follow steps: press the shutter button, and then press the "3D" button to switch to 3D mode, and reshoot the picture.
This checklist is very important, because if the pictures are not good for 3D digitizing, and the patients are gone, it would be very embarrassing to re-schedule an appointment with them again.
How can I transfer files from 3D camera to my computer?
Basically, there are two ways to transfer the files from the camera to to your computers: via USB cable or via an SD card-reader. In the following example, we assume you use the USB cable to connect the camera to the computer, because not all people have an SD card-reader. If you use the USB cable to connect the camera, you will not be able to reduce the file size directly from the camera. So we need to copy the files to a folder on the hard drive first.
Please go back to "How can I tell the format of a file" section above to change the "Folder Option" if you haven't.
- Connect Fujifilm Camera to your computer using the USB cable that came with the camera.
- Click "Start" button from Windows' task bar.
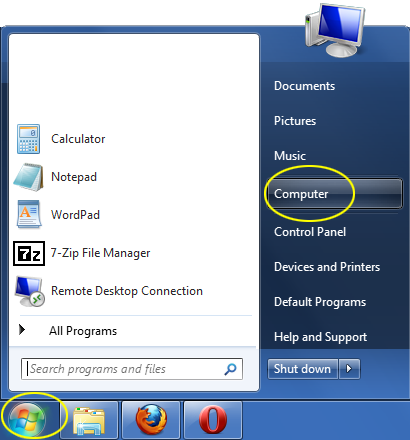
- Choose "Computer".
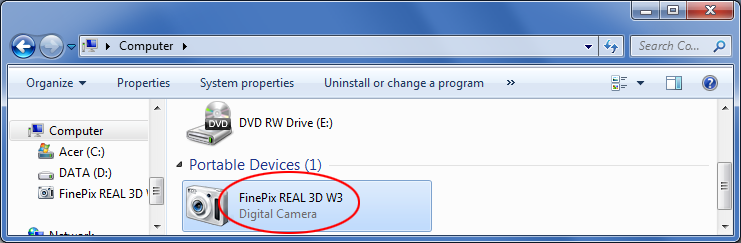
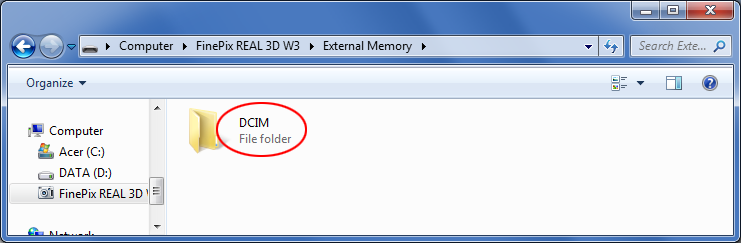
- Double-click "FinePix REAL 3D W3", either from the left panel or the right panel.
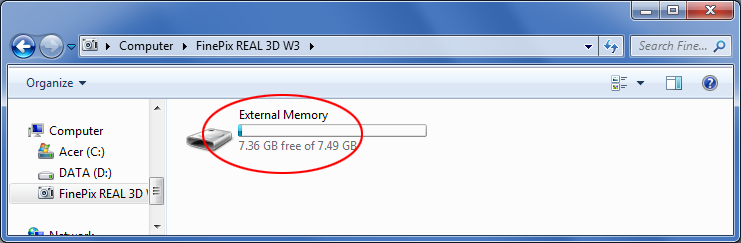
- Double-click the "External Memory" folder.
- Double-click "DCIM" folder.
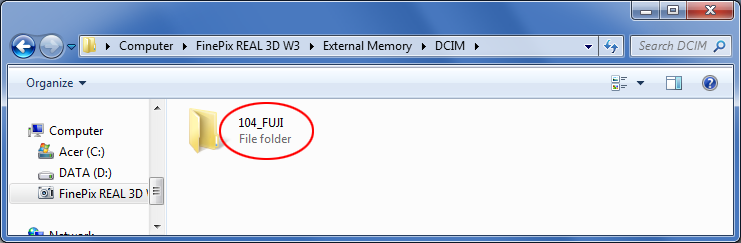
- Double-click "###_FUJI" folder. Here "###" means a 3-digit number, different cameras may use different numbers.
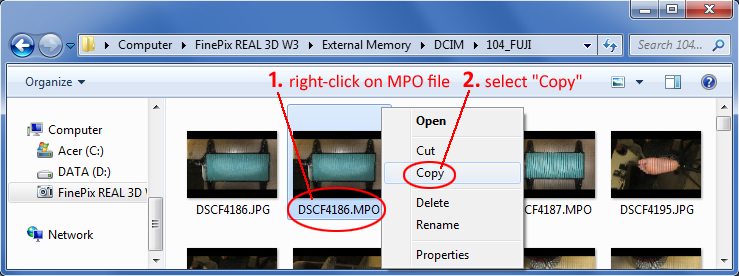
- Click the MPO files while holding the "Ctrl" key, this way it allows you to select multiple files.
- Right-click on one of selected files, then choose "Copy".
- Right-click on "Pictures" library from the left panel. Scroll the panel if you don't see the "Pictures" library.
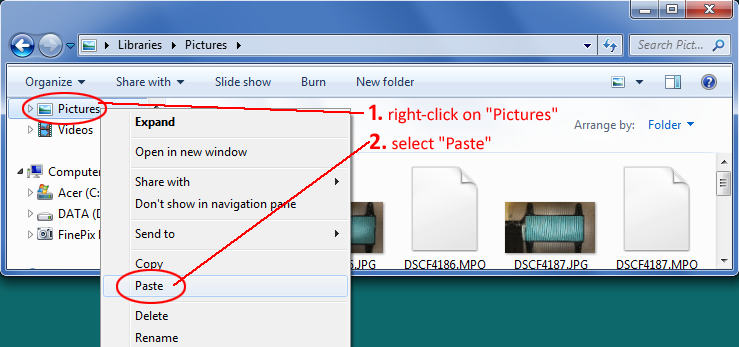
Of course, you can copy the MPO files to any folders you like, but for the beginners, we use the "Pictures" library folder in our example.
How can I use MPOViewer to reduce the file size?
The original size of an MPO file is 1.4MB to 5MB, depending on the resolution you set on the camera. But for shoes and foot orthotics, the resolution does not need to be that high. Also all MPO files will be submitted through the Internet, it would be ideal to reduce the file size first before uploading, which in turn will reduce the uploading time. Here's how:
- Copy the MPOViewer program from the CD which came with the camera, to your computer's desktop. This is optional, because you can directly start the MPOViewer from CD.
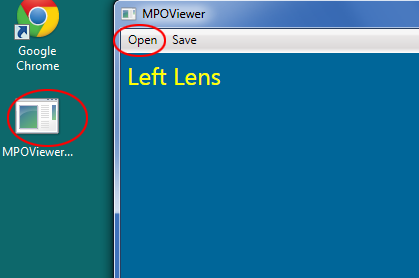
- Double-click the MPOViewer program either on the CD or from your computer's desktop. If you see any error messages, it means that your computer does not have the correct Microsoft .NET package installed. The correct .NET package can be found on the companion CD, the file name is "dotnetfx35.exe". Just double-click on it to install.
- Click "Open" from MPOViewer's menu. Browse to the "Pictures" library, and double-click on an MPO file. You should see two pictures contained in that MPO file, one from the camera's left lens, and one from the right lens.
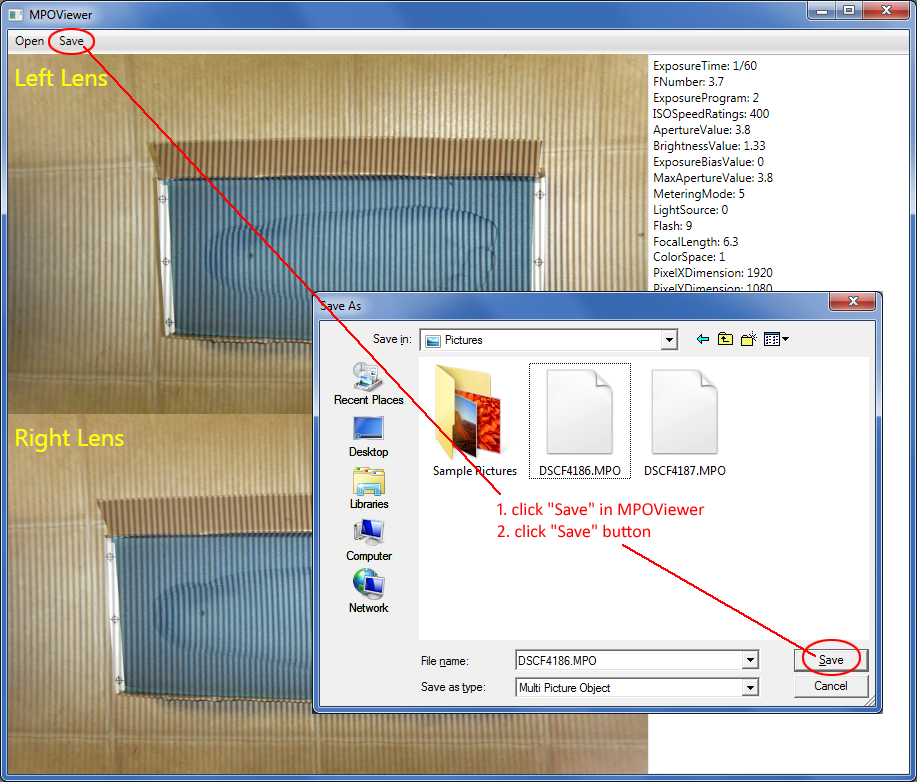
- Click "Save" from MPOViewer's menu.
- Click "Save" button to overwrite the original file.
If you want to keep the original file, you can change the file name before clicking the "Save" button.